
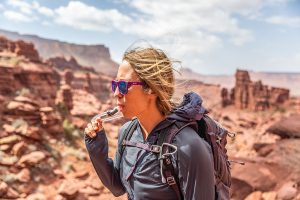
Having a hydration pack inside your backpack is an easy and convenient way to stay hydrated during your next outdoor adventure.
Here are some tips on how to ensure your hydration pack fits snuggly and securely inside your bag so you can keep moving without worrying about leaks or spills.
Steps
- Start by removing all excess items from the backpack; this makes it easier to access the internal storage pockets needed for placement of the hydration system.
- Check the manufacturer’s instructions for proper installation; this will give you an idea of where exactly the bladder should be stored within your bag.
- Place the drinking tube and valve through designated slots/loops located on either side of the backpack; this allows you to easily access the pouch while in motion without needing to take off the bag if necessary.
- Securely attach any adjustable straps available onto additional ports located nearby; this helps lock down the bladder into place preventing any accidental movements or damages while walking around with it on your back.
- Double check that all clips/latches have been securely closed before setting out on your journey!
Dos & Don'ts:
Do
Make sure to store extra items like snacks or utensils in separate compartments within the pack; this prevents them from rubbing against unprotected parts of the bladder which could cause damage over time
Don't
Overfill your backpack with items beyond what fits properly; having too much weight can pull against the straps and release irritating pressure points throughout your body
Common Mistakes to Avoid
Many people underestimate the importance of securing the hydration pack properly. Failing to fully tighten the straps can lead to sloshing during movement. This not only causes discomfort but may also dislodge the pack.
Another frequent error is overloading the backpack. If you cram too many items alongside the hydration pack, it can cause pressure points. This makes it uncomfortable to wear for extended periods.
Don’t neglect the hose. Some users let it dangle loosely, leading to tangles and potential leaks. Always secure it properly to prevent these common issues.
Cost Comparisons: Choosing the Right Pack
The cost of hydration packs varies widely. Basic models start around $20, while premium options can exceed $100. Consider how often you’ll use it. For casual use, a lower-priced option may suffice.
When you look at backpacks, a quality one can range from $50 to $300. Higher costs often come with added features like water resistance and extra compartments. If you’re planning lengthy hikes or outdoor activities, investing in a more durable pack could be worthwhile.
Try to find a balance between functionality and affordability. Determine which features matter most to you. A mid-range backpack can provide enough support without breaking the bank.
Maintenance Tips for Longevity
Keeping your hydration pack clean is essential for hygiene and performance. After each use, rinse out the reservoir with warm water. Avoid putting it in a dishwasher, as high heat can damage components.
Inspect the hoses and connectors regularly. Make sure they're free of cracks or leaks. If you find any damage, replace those parts to ensure everything functions properly.
Store your hydration pack in a cool, dry place. Avoid direct sunlight, which can degrade the material over time. By caring for your equipment, you extend its lifespan significantly.
Who Suits Each Option?
Choosing between a hydration pack and a backpack with water storage largely depends on your activity type. If you're hiking for several hours, a hydration pack is great due to its hands-free convenience. Cyclists also favor these packs for their lightweight design.
For day trips or urban settings, a larger backpack with integrated hydration might be more suitable. It allows you to carry essentials like snacks, clothing, or gear alongside your hydration system. Families may prefer backpacks for versatility.
Tips for Efficient Packing
When placing a hydration pack in a backpack, follow strategic packing techniques. Start by emptying your backpack entirely. Then, position the hydration bladder in a dedicated sleeve, ensuring it's not crumpled.
Next, lay smaller items around it to prevent movement. You can also use compression straps or mesh pouches to keep everything stable. This organization maximizes space and minimizes noise while you travel.
Incorporate these packing tips:
- Place heavier items low for better balance.
- Avoid sharp objects next to the bladder.
- Keep hose access easy by routing it through zippers or openings.
Following these packing methods enhances comfort and saves time during your outdoor adventures.
FAQs
Is there any way I can add more water during my travels?
Yes, most models come with additional exterior pockets ideal for storing extra bottles/jugs of water in case yours runs out while trekking around outdoors.
Is there any way I can add more water during my travels?
Yes, most models come with additional exterior pockets ideal for storing extra bottles/jugs of water in case yours runs out while trekking around outdoors!
What should I do if the hydration pack is too big for my backpack?
If your hydration pack is too large, considering using a smaller model that fits better. You may also be able to adjust straps on both the bag and bladder to make placement more secure. Lastly, you could look into external mounting systems that securely attach the bladder onto the outside part of your bag.
Pro Tip: Keep track of weather forecasts before embarking on trips; colder climates require proper insulation layers otherwise temperatures could cause freezing issues with bladders over extended periods of time!
See also: What Size is a Standard Backpack?
See also: How to Strap a Sleeping Bag to Your Backpack?
Conclusion
Following these simple steps ensures that packing a hydration pack into a backpack isn’t complicated, helping you stay refreshed and energized throughout whatever outdoor activity you may be doing! With preparation, planning, and organization comes added comfort knowing that no matter where adventure takes you, you’ll always be ready!